Quick Tutorial
Quick Tutorial
You have now installed Crawlab and perhaps can't wait to start using it. Before you go deep into the details, I would suggest you go through this quick tutorial which would walk you through some basics and get you familiar with some main features in Crawlab.
Introduction
In this tutorial, we are going to create a spider that crawls quotes on a mock site provided by Zyte (the company behind Scrapy); then we will upload this spider to Crawlab, and run it to extract quotes data; finally, we will view the crawled data visually on Crawlab.
The framework we are going to use is Scrapy, the most popular web crawler framework written in Python, which is easy to use yet with many powerful features.
Note
We assume you have installed Crawlab on your local machine by following Quick Start. If you haven't, please refer to Quick Start to install it on your local machine.
As we are using Scrapy, please make sure you have installed Python (>=3.6) and module management tool pip before proceeding any further steps.
Create Spider
First thing first, we are going to generate a Scrapy project. Let's start by installing Scrapy.
pip install scrapy
Then, let's create a Scrapy project called scrapy_quotes.
scrapy startproject scrapy_quotes
Now you should be able to see the folder structure of the newly created spider.
Then generate a new spider by executing the command below.
cd scrapy_quotes
scrapy genspider quotes quotes.toscrape.com
The folder structure of the spider should look similar as below.
scrapy_quotes
├── scrapy.cfg
└── scrapy_quotes
    ├── __init__.py
    ├── items.py
    ├── middlewares.py
    ├── pipelines.py
    ├── settings.py
    └── spiders
        ├── __init__.py
        └── quotes.py
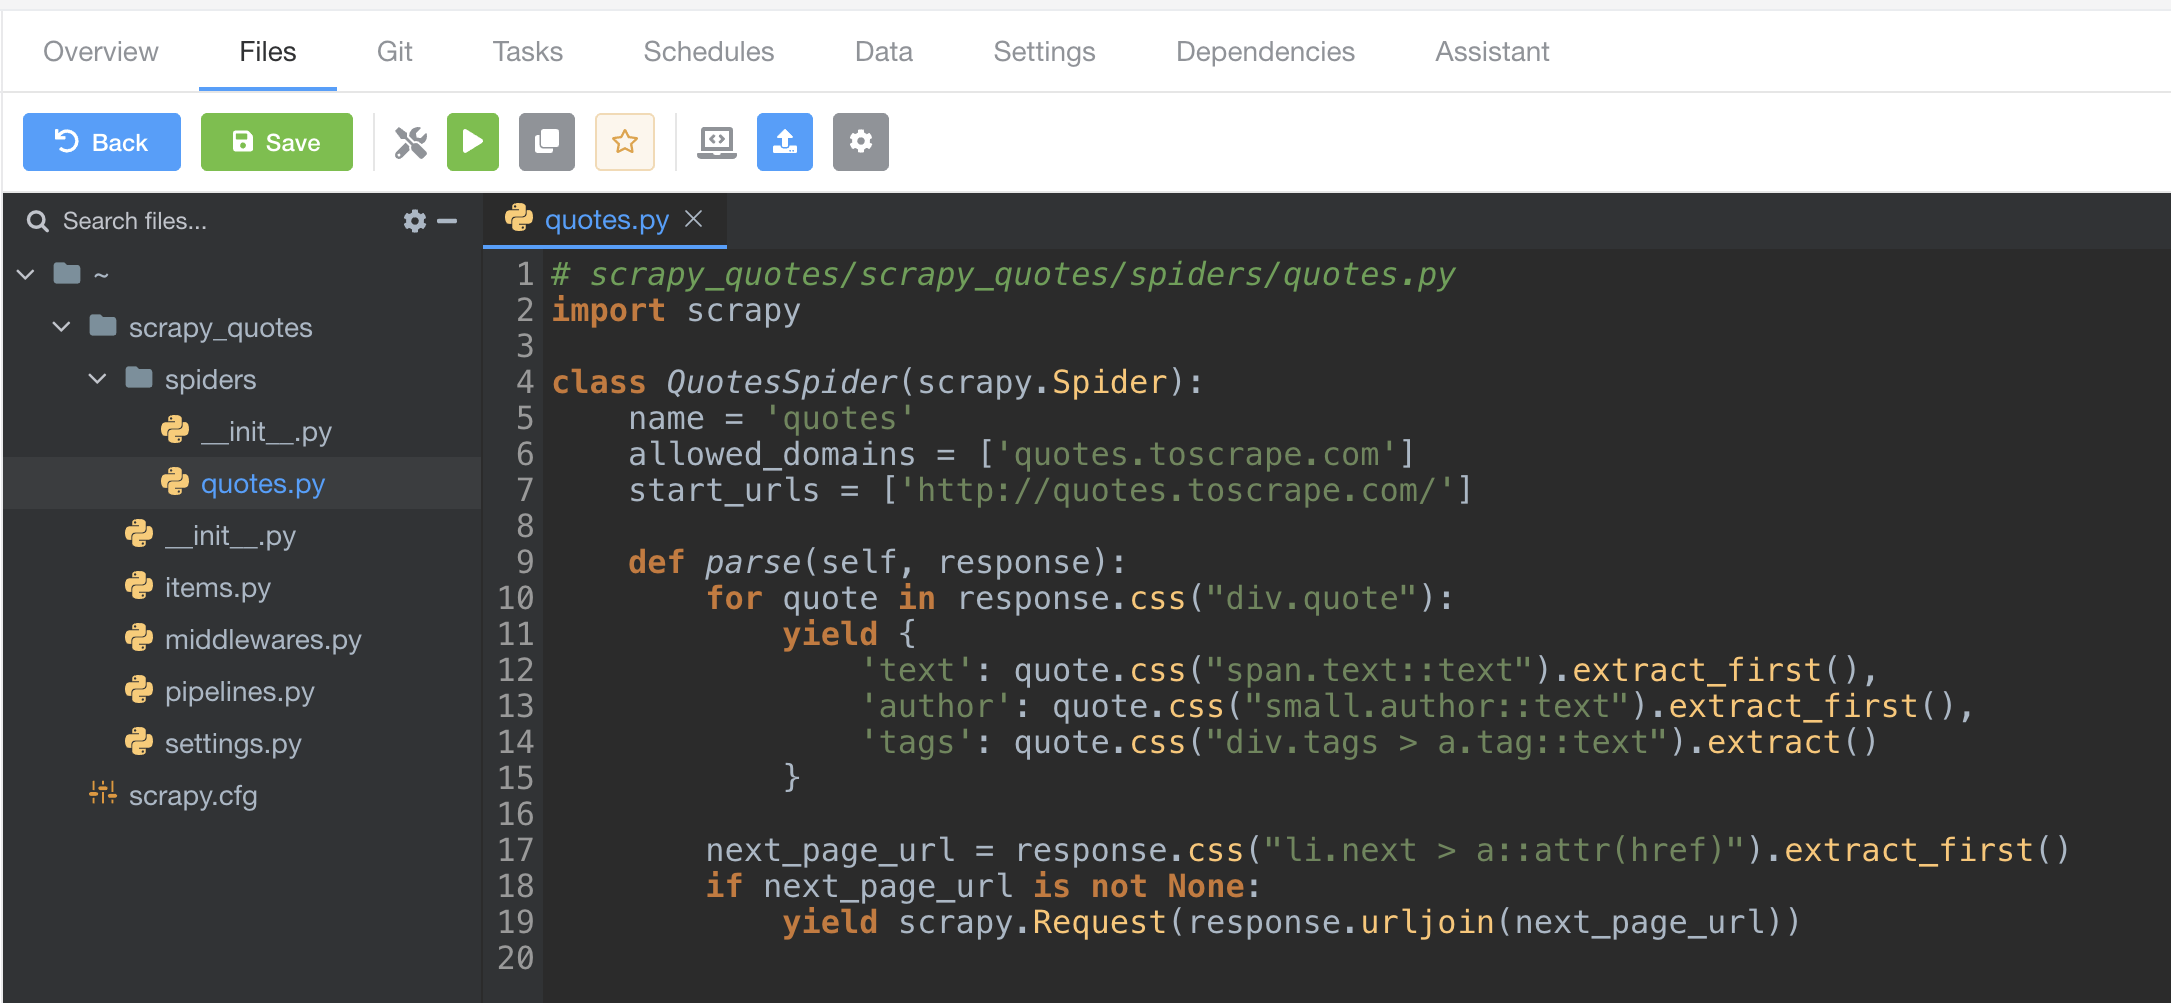
Let's open file scrapy_quotes/scrapy_quotes/spiders/quotes.py and replace original content with the code below.
# scrapy_quotes/scrapy_quotes/spiders/quotes.py
import scrapy

class QuotesSpider(scrapy.Spider):
    name = 'quotes'
    allowed_domains = ['quotes.toscrape.com']
    start_urls = ['http://quotes.toscrape.com/']

    def parse(self, response):
        for quote in response.css("div.quote"):
            yield {
                'text': quote.css("span.text::text").extract_first(),
                'author': quote.css("small.author::text").extract_first(),
                'tags': ','.join(quote.css("div.tags > a.tag::text").extract())
            }

        next_page_url = response.css("li.next > a::attr(href)").extract_first()
        if next_page_url is not None:
            yield scrapy.Request(response.urljoin(next_page_url))
Then open file scrapy_quotes/scrapy_quotes/settings.py and add the code below at the end of the file.
# add at the end of scrapy_quotes/scrapy_quotes/settings.py
ITEM_PIPELINES = {
    'crawlab.CrawlabPipeline': 300,
}
We have now created a Scrapy spider that is available for integration into Crawlab. We can then upload it to Crawlab.
Upload Spider
Now open the browser and navigate to http://localhost:8080, and login with default username/password admin/admin.
Then go to Spiders page, and click New Spider on the top left to open the create dialog.
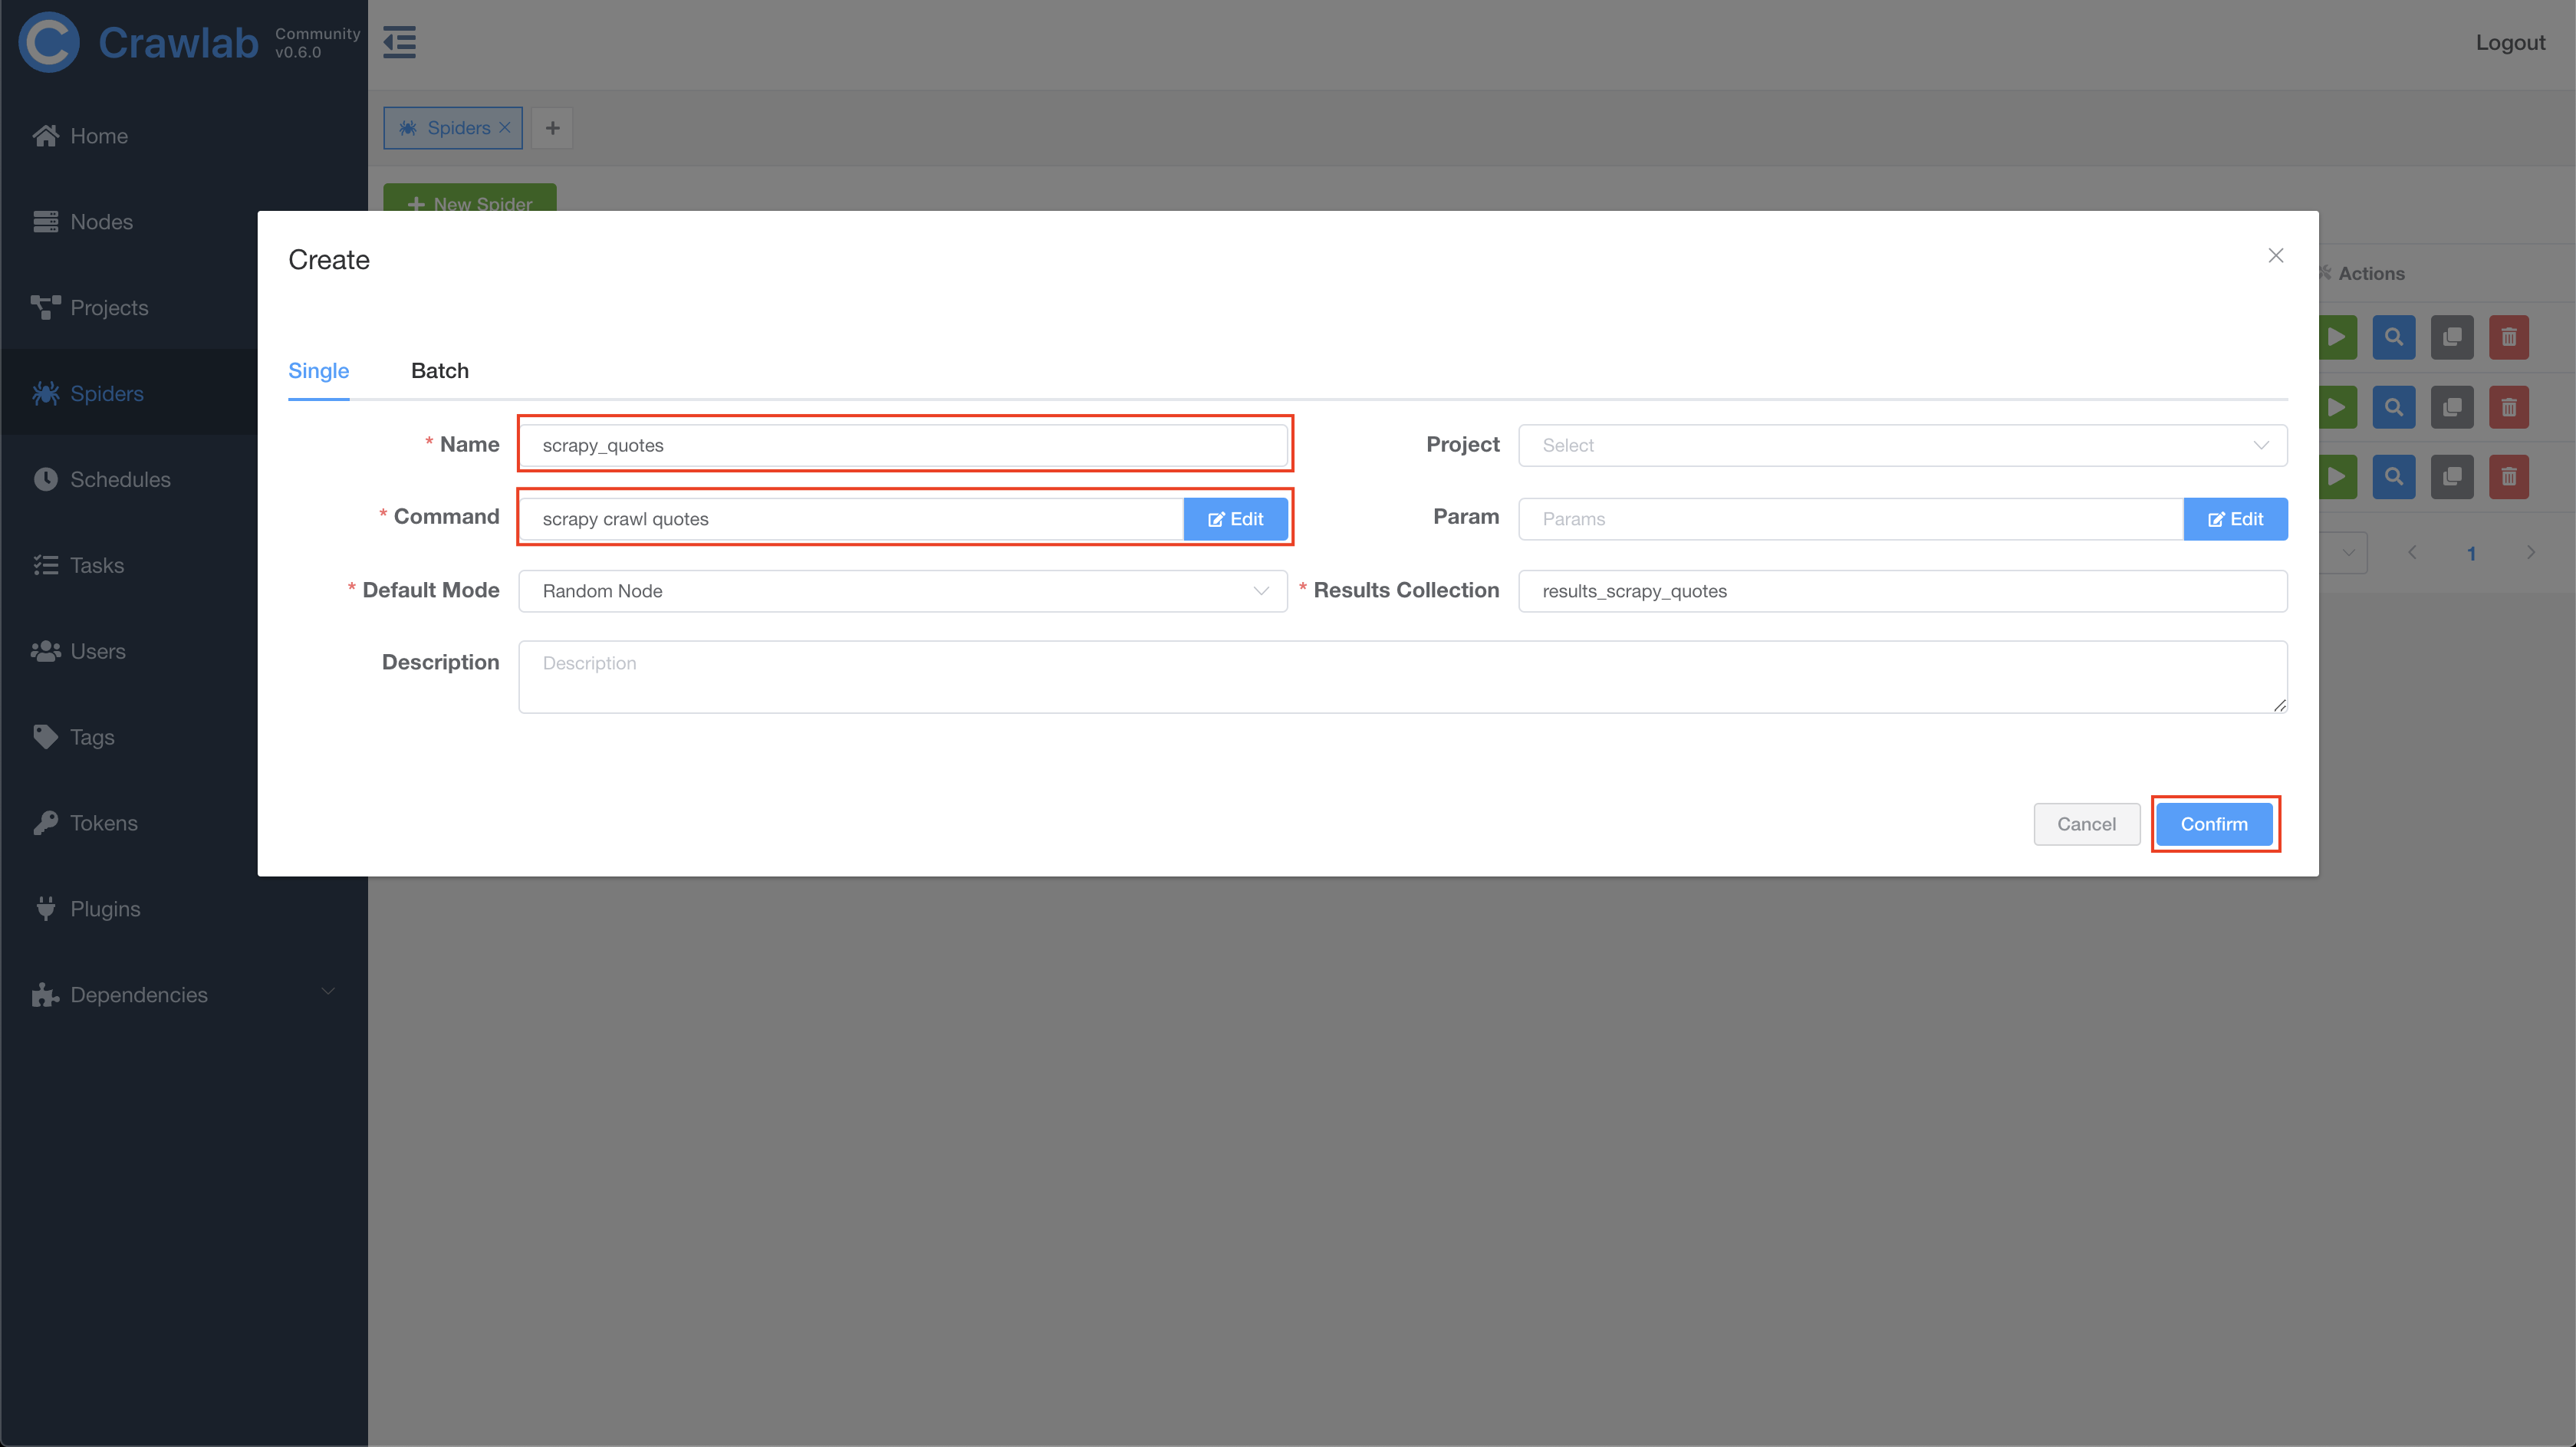
In the dialog, enter the info as below, and click Confirm to create a spider on Crawlab.
- Name:
scrapy_quotes - Command:
scrapy crawl quotes
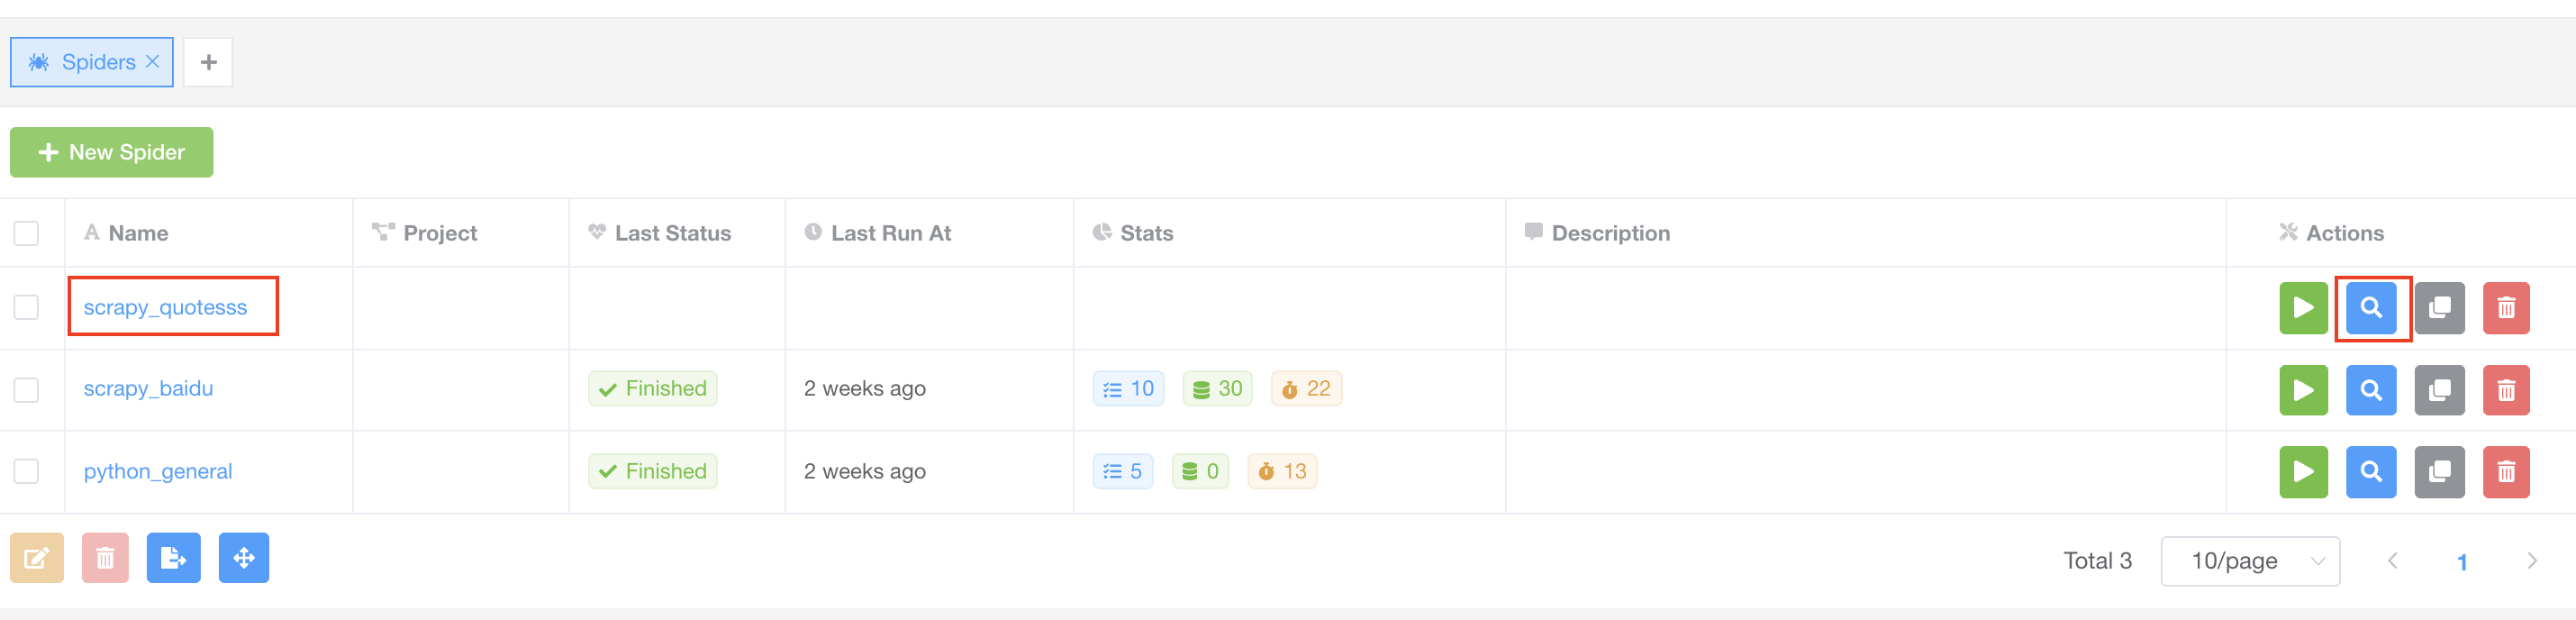
Now we have created a spider in Crawlab, and we need to upload spider files to it.
Click the spider name link or the blue button with search icon on the right named View to navigate to its detail page.
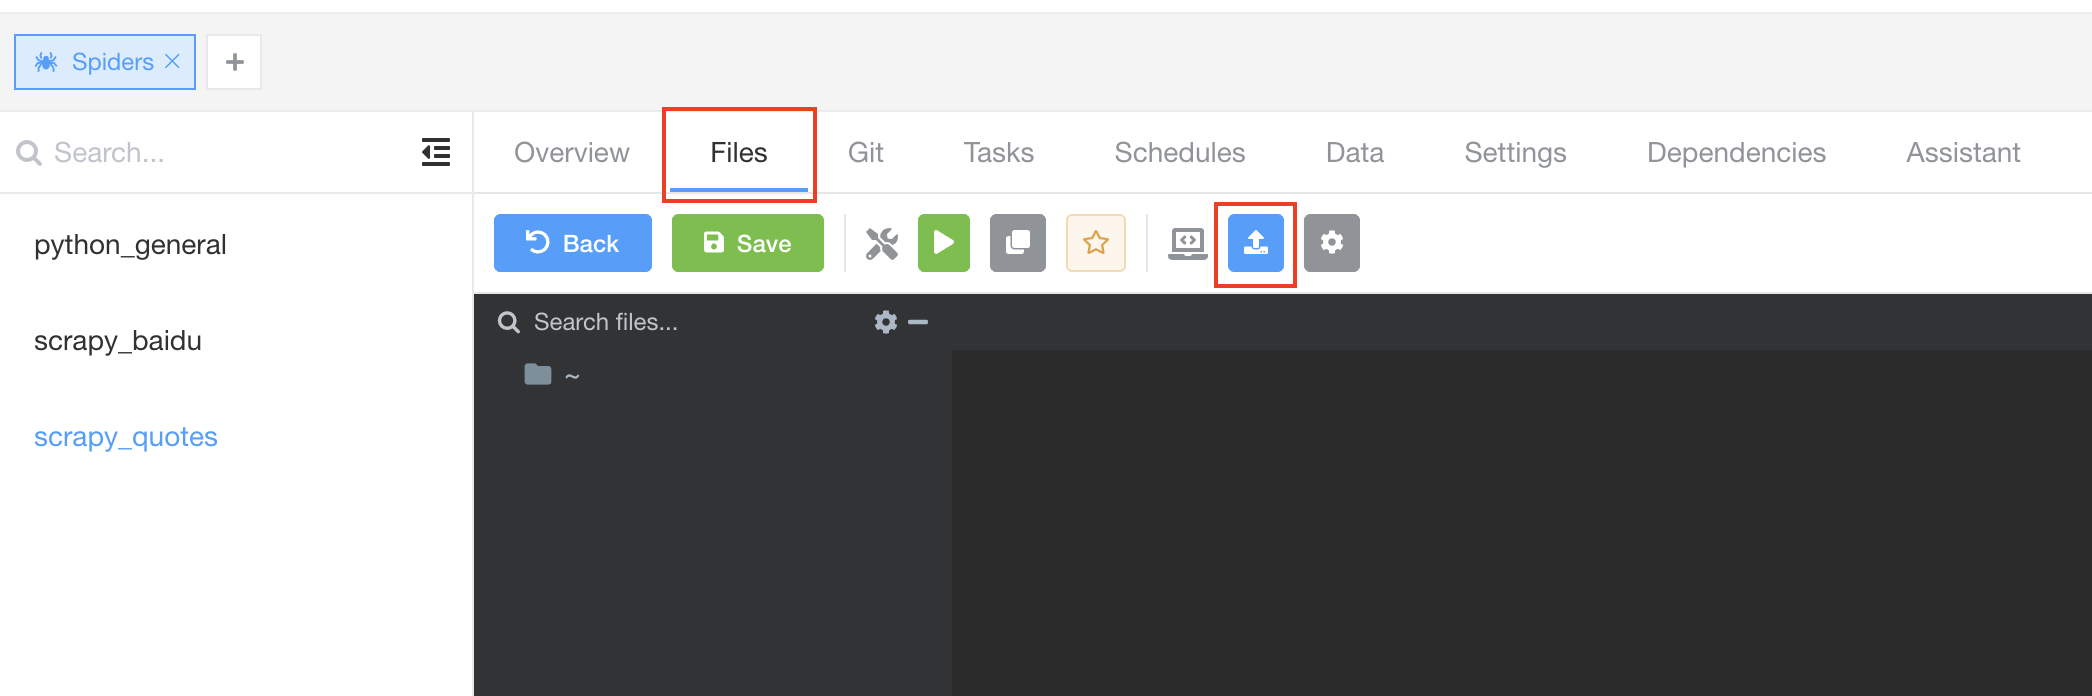
In the detail page, click Files tab to navigate to the file editor tab, and click Upload Files button on the nav bar.
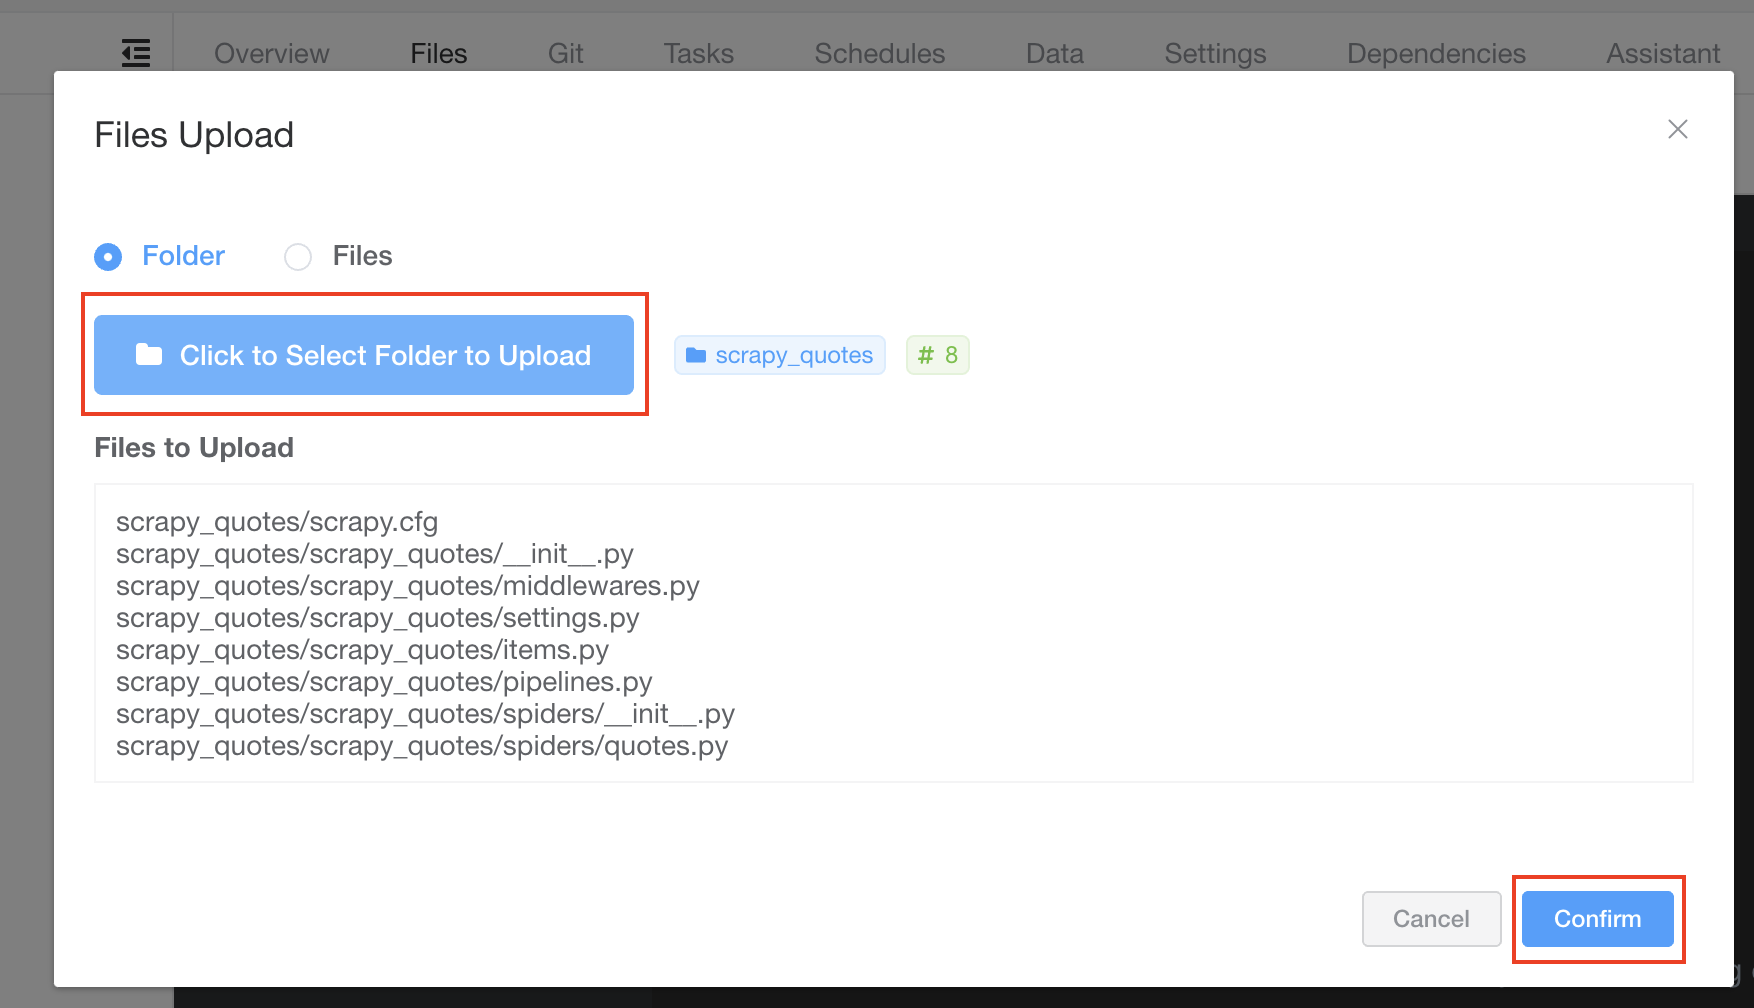
Click the button Click to Select Folder to Upload and choose the folder of the Scrapy spider we created earlier, and click Confirm to upload the spiders.
Now you should be able to see the uploaded files and folders on the left file navigator. You can play around it by expanding folder or double-clicking files to open it.
Run Spider
Running spider is quite simple.
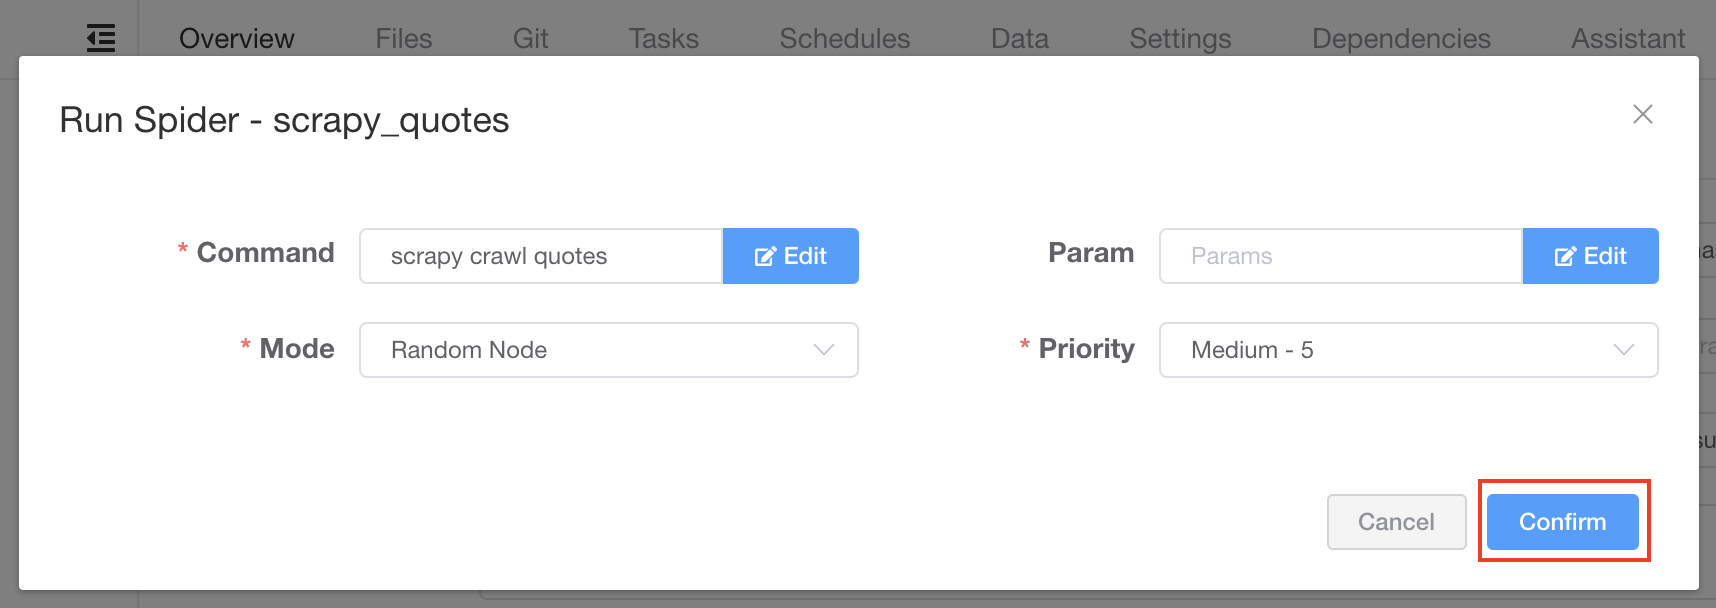
Let's run it by clicking the button with play icon Run, and click Confirm with default settings.
View Task
Great! We have just triggered a spider task, and we should be able to view it in Tasks tab. Let's click on Tasks tab to take a look.
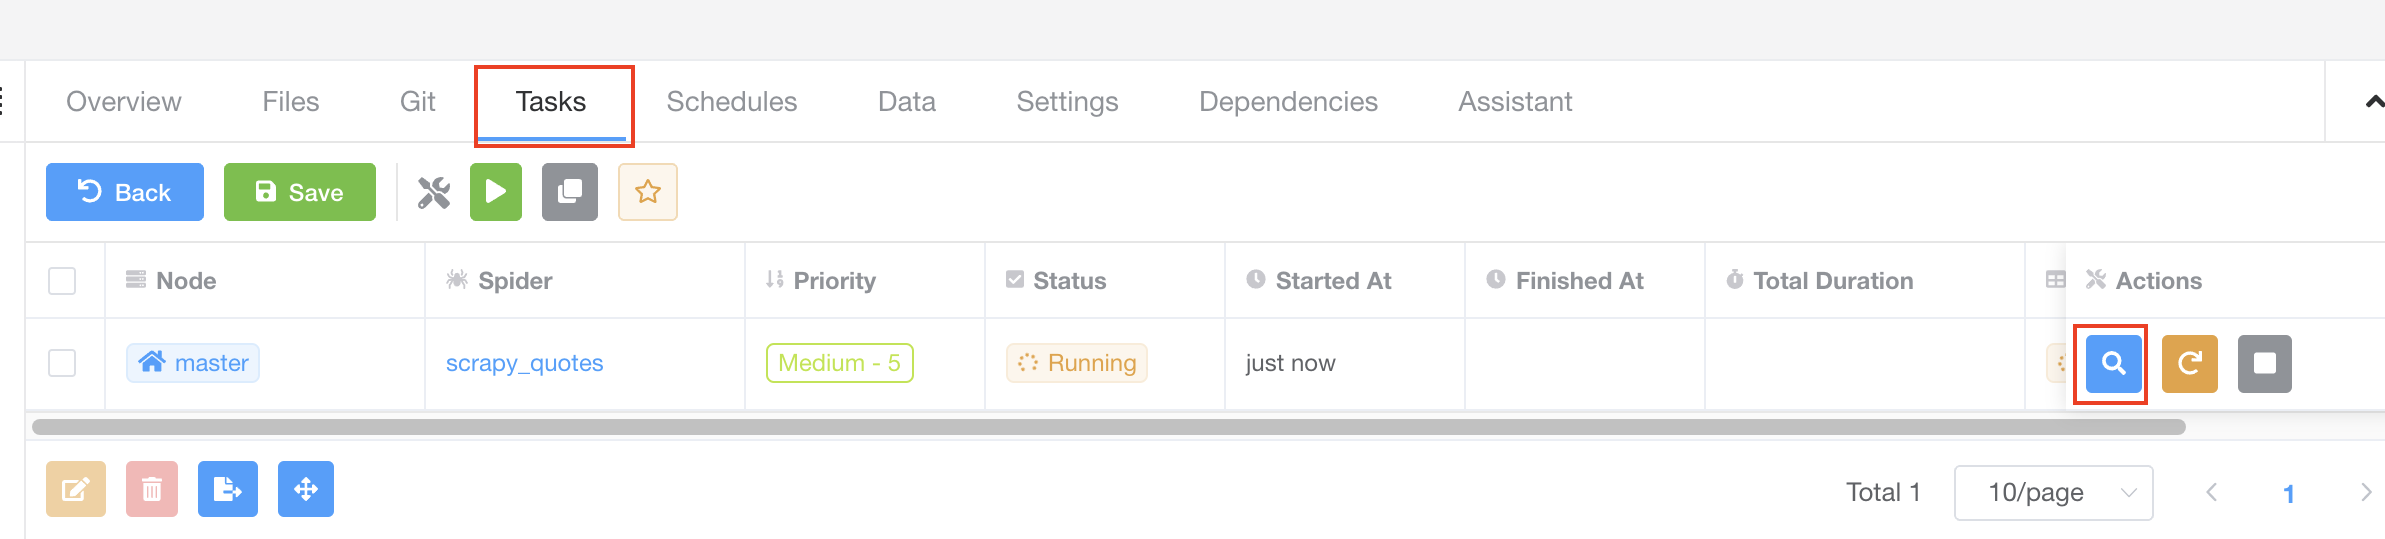
The task is running, and we can view the task detail by clicking the View button on the right.
We can then view realtime logs by clicking Logs tab.
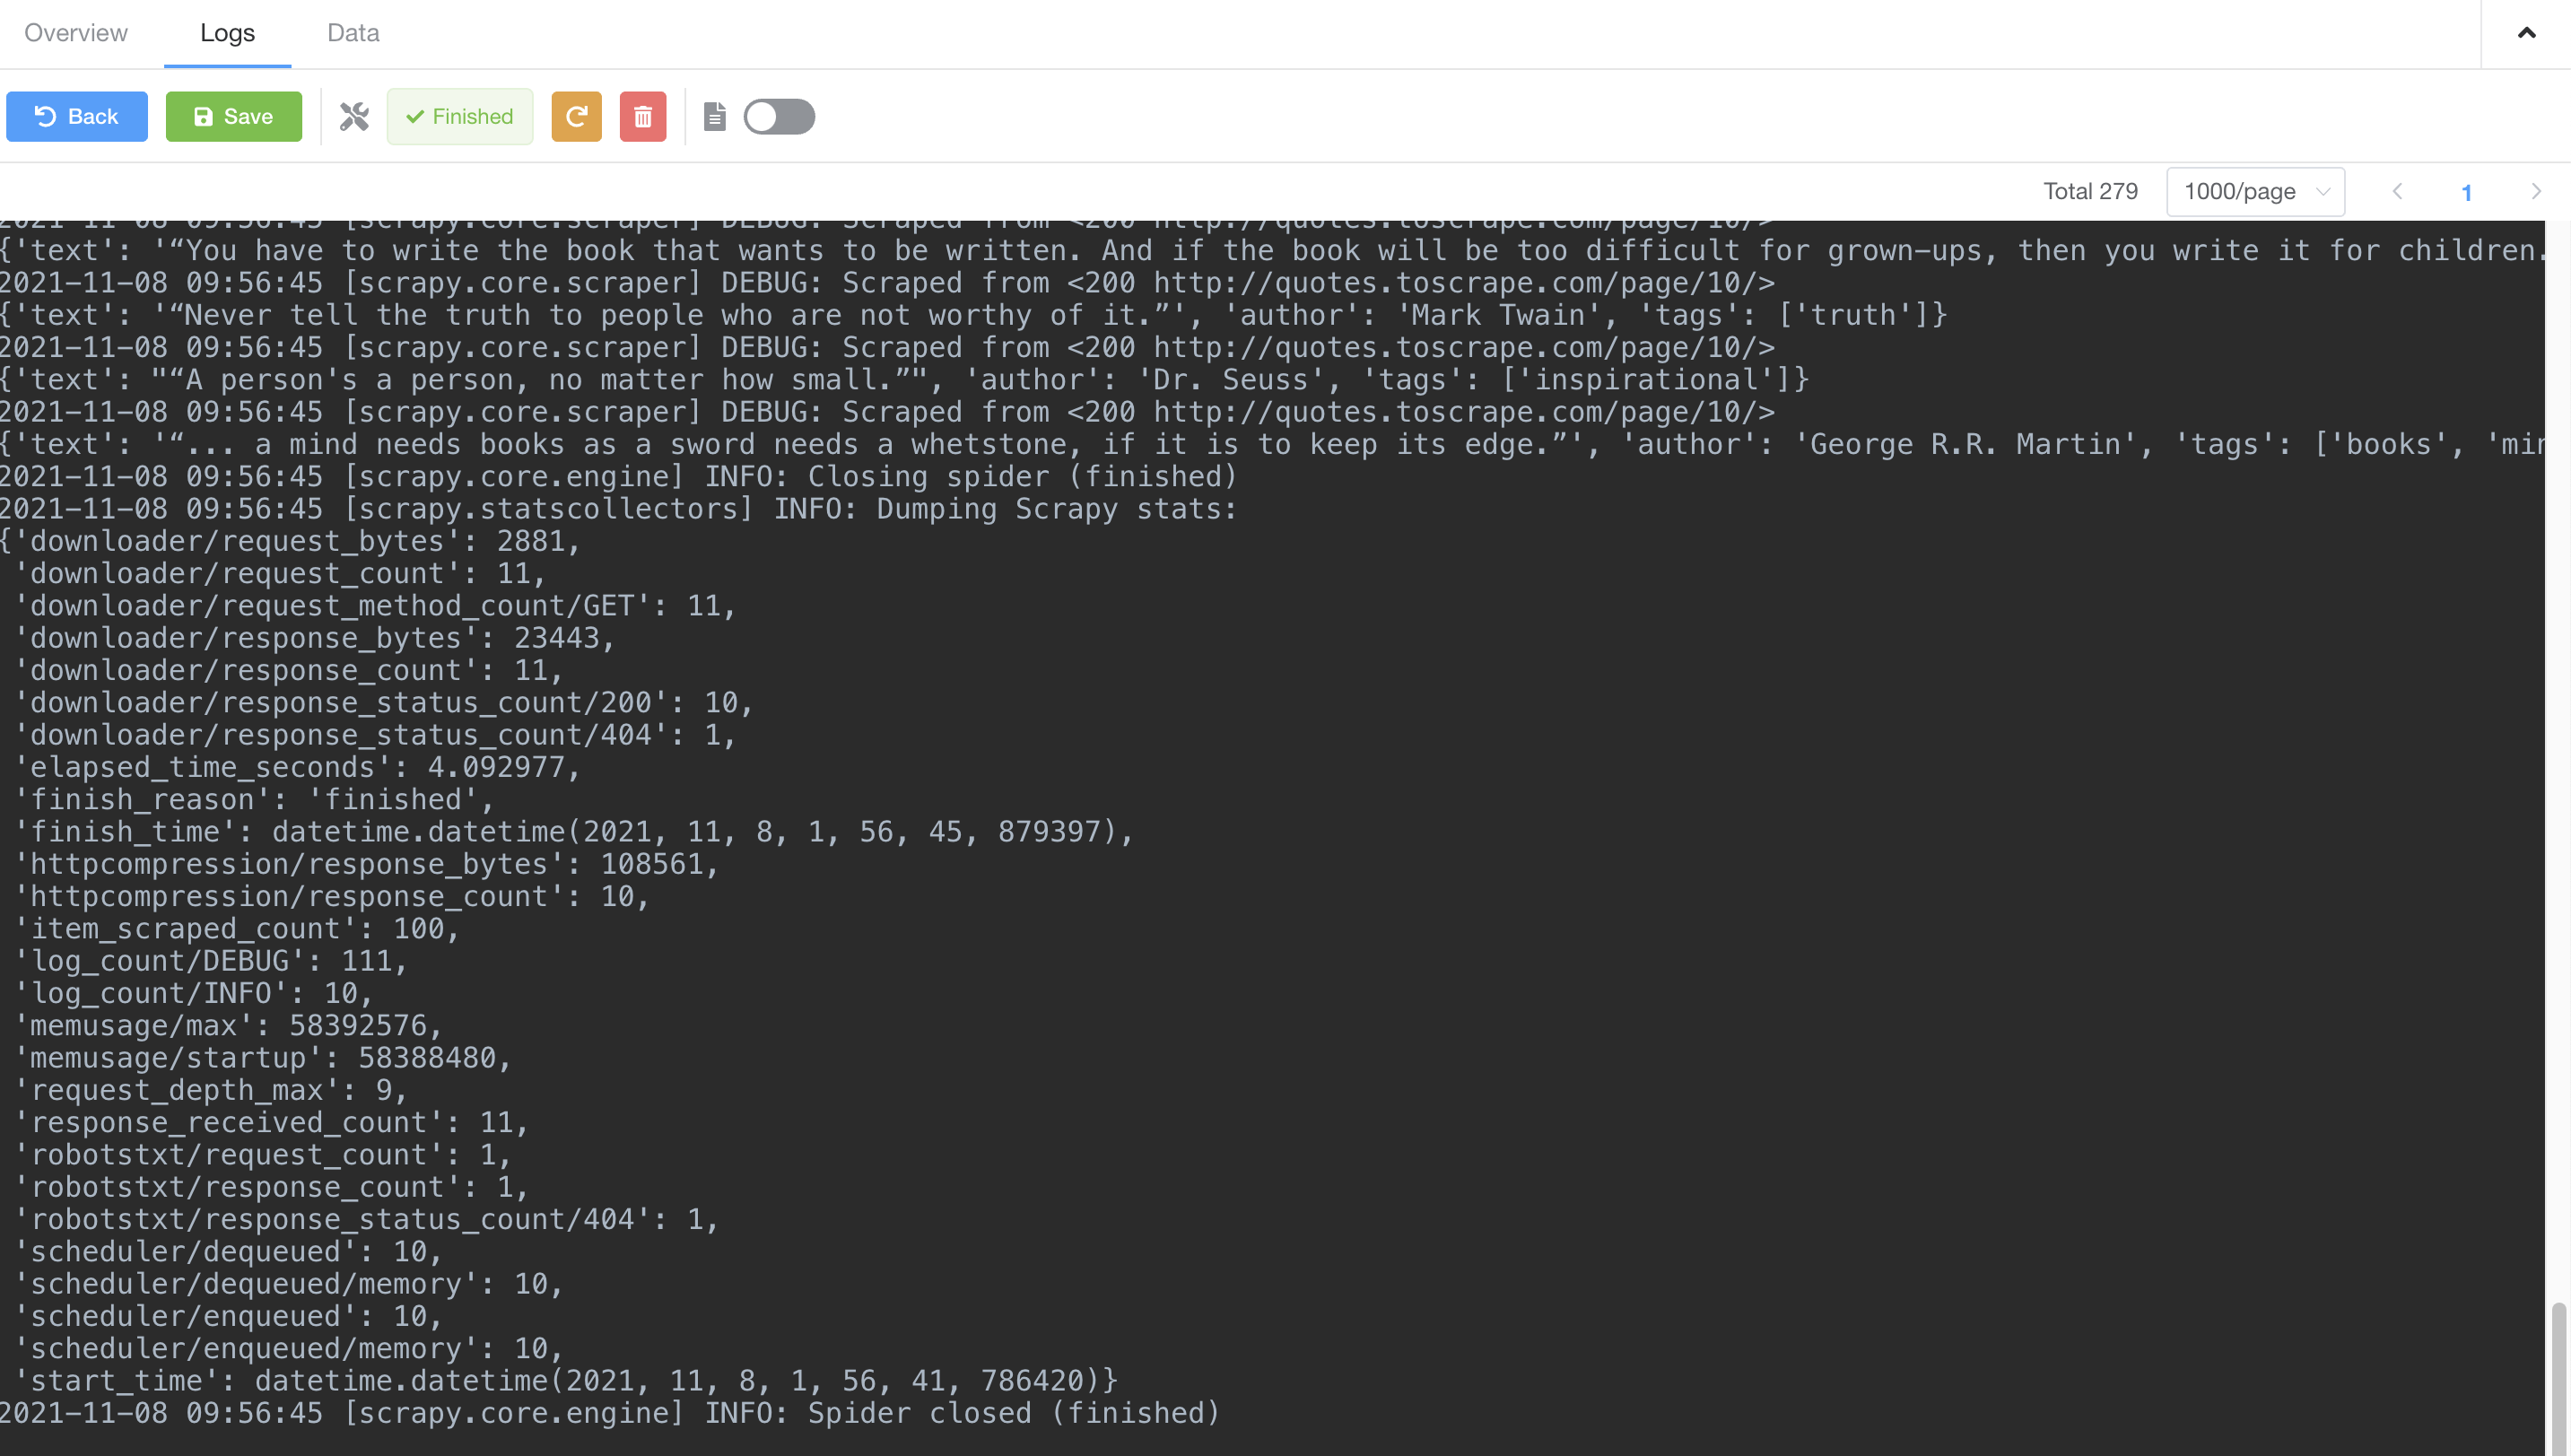
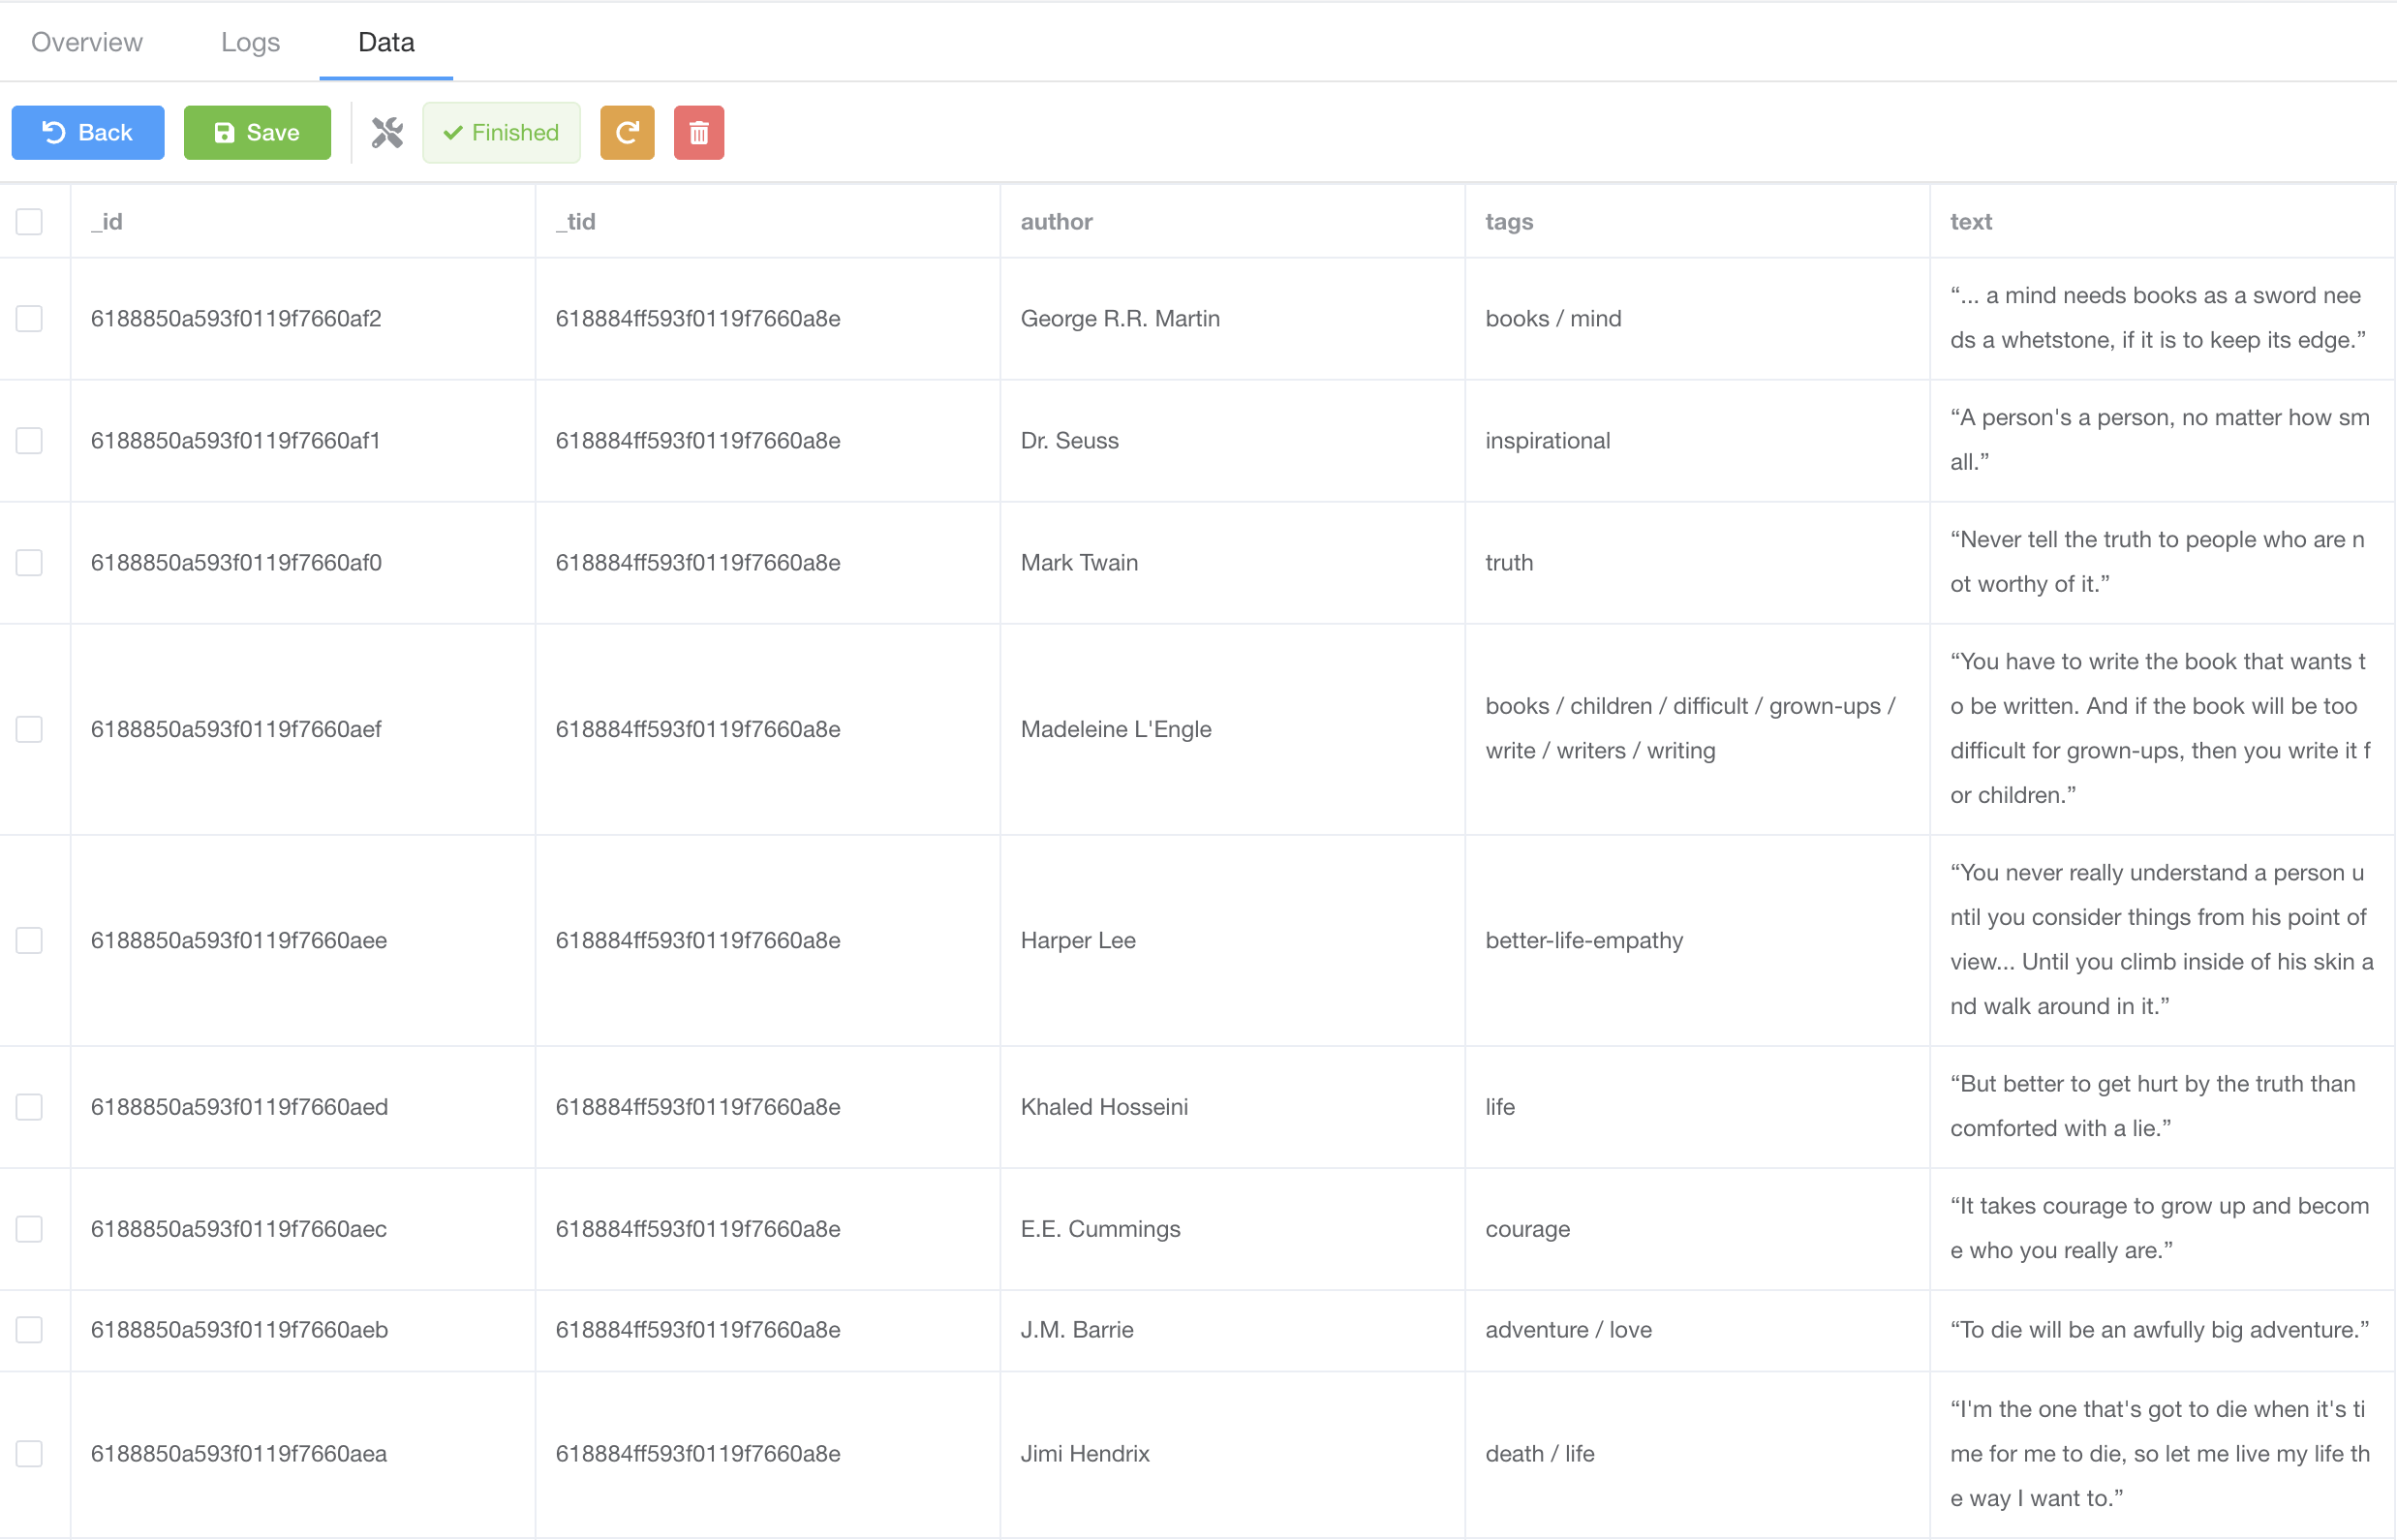
As the spider is crawling, we can also view crawled data by clicking Data tab;
Spider Stats
If we go back to Spiders page, we should be able to see the stats of the spider.

Summary
Let's do some recap here. We have followed a simple process to run a Scrapy spider on Crawlab.
- Created a Scrapy project on local.
- Created a spider on Crawlab
- Uploaded spider files to the spider
- Triggered a task
- View realtime logs and crawled data along with spider stats on Crawlab.
What Next
This quick tutorial provides you with a basic understanding about Crawlab and how to use it to crawl data, including monitoring task logs and view crawled data, etc. But you should be aware that Crawlab is not only limited to that, there are many other powerful features such as Node Management, Git Integration and Dependency Installation which you might be interested in. You can check out other sections of this guide to learn how to use those features.